Building a Local Repository
In this lab, I will create a local repository so I can install packages without an internet connection.
What is a repository?
A repo (short for repository) is a location where Linux stores software packages and updates. You can download packages from a configured repo by using the command yum/dnf install (package, i.e httpd). Repos are usually hosted on the internet, but what if you don't have an internet connection? That's where local repos come into play; they allow you to download packages even if you don't have internet access and also give you a consistent, reliable package source.
Lab Environment
Virtual Machine - VMware Workstation Pro
Remote Access (SSH) - PuTTY
Operating System (ISO Image) - Red Hat Enterprise Linux 10.2 (DVD ISO)
Step-by-Step Commands
These are the commands I used, the step-by-step process I followed, and what each one does.
1.) After creating the server, I typed lsblk (list block devices) to find my ISO image.
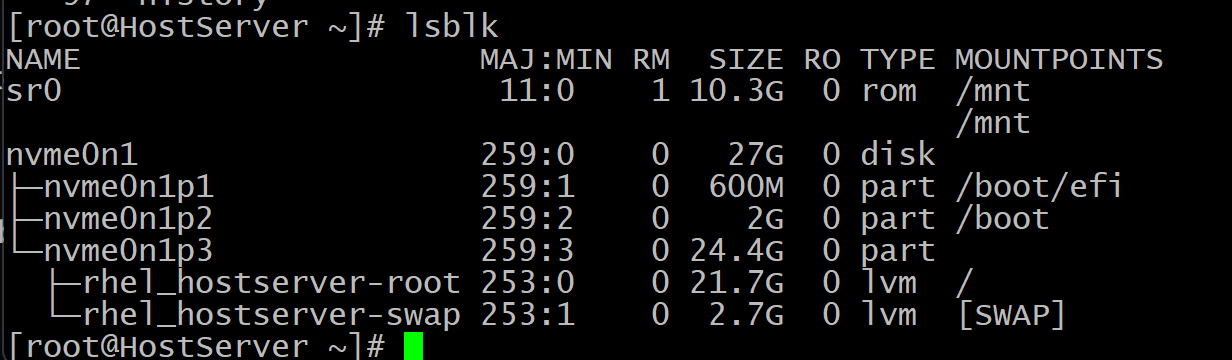
2.) After finding my ISO image, which in this case was sr0, I ran cd /mnt and then mount /dev/sr0 /mnt. /dev is the directory the ISO is located in, and I mounted it to /mnt since it's a temporary directory (meaning that when you power off or restart your system, everything inside it will disappear.
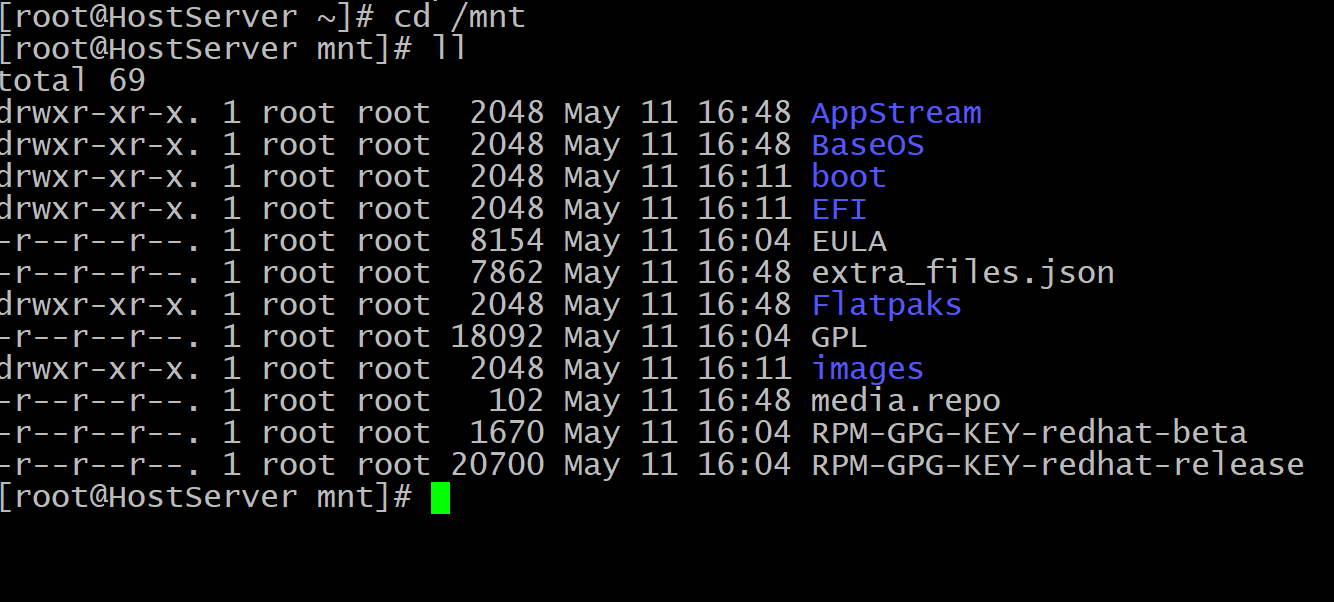
3.) I then ran the command mkdir /localrepo and then copied everything from /mnt to /localrepo using cp -av * /localrepo.
cp = Copy
-a = Archive (Gives an exact copy, preserves permissions, ownership)
-v = Verbose (Shows each file as it's copied)
* = All files and directories in the current directory
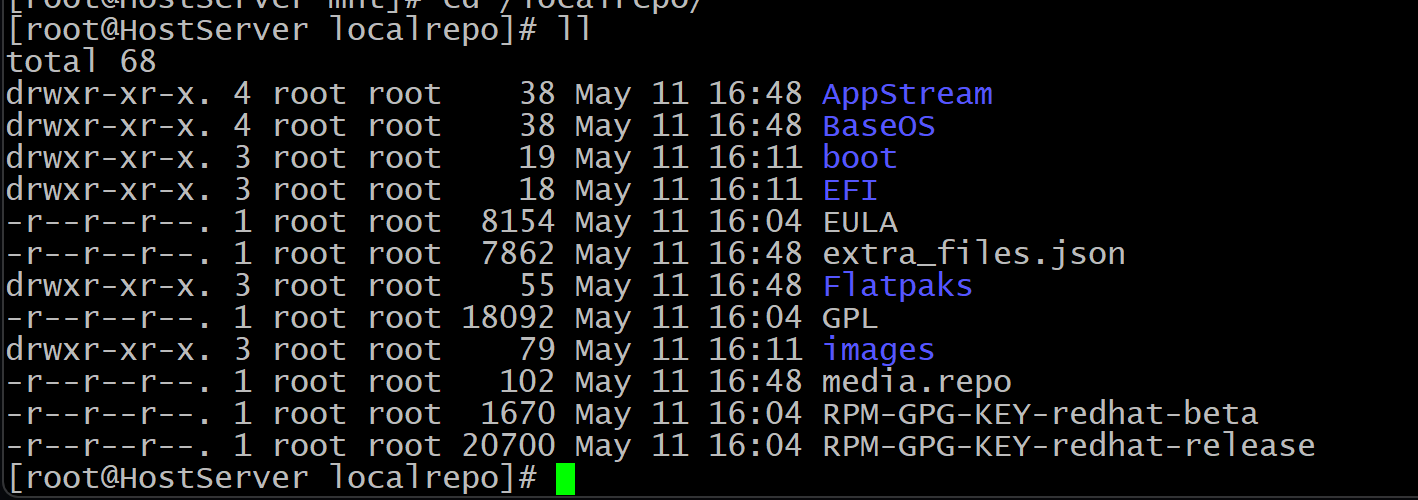
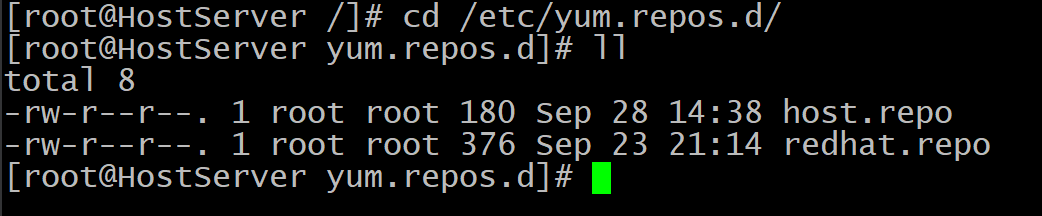
4.) From there, I used cd /etc/yum.repos.d and created a file using touch host.repo.
Note: /etc/yum.repos.d is a directory that contains config files. These config files tell Red Hat where to look for software packages, updates, and other content that can be installed on the system. You can name the file anything, but it must end with .repo for Red Hat to recognize it.
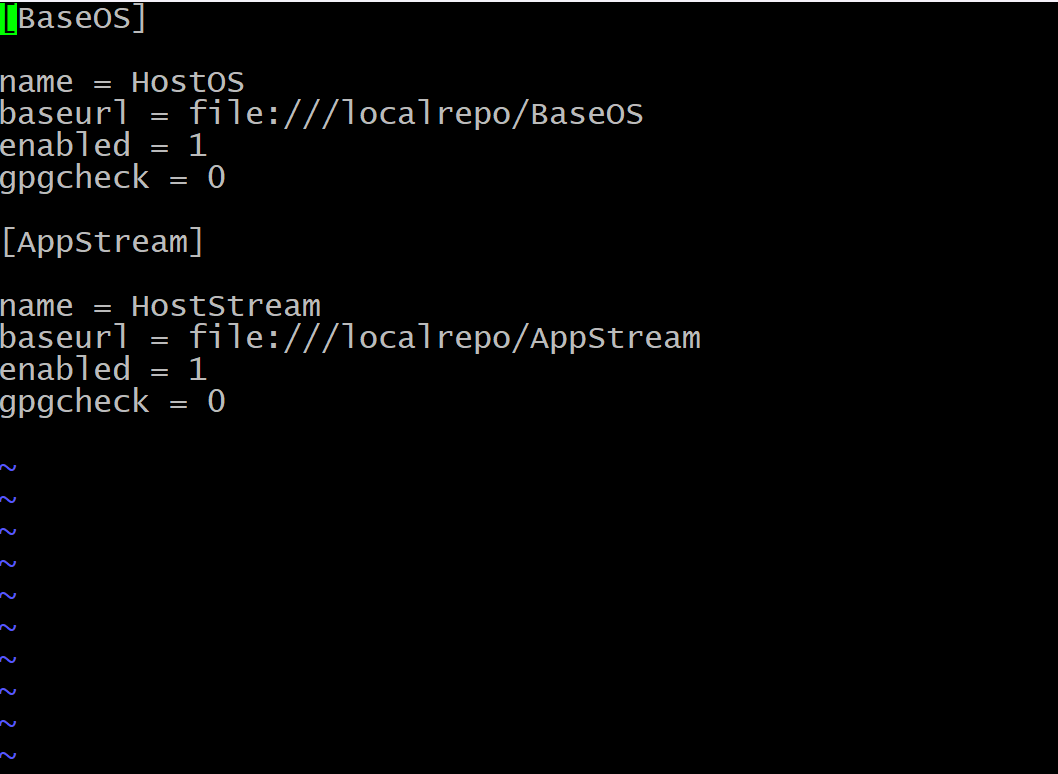
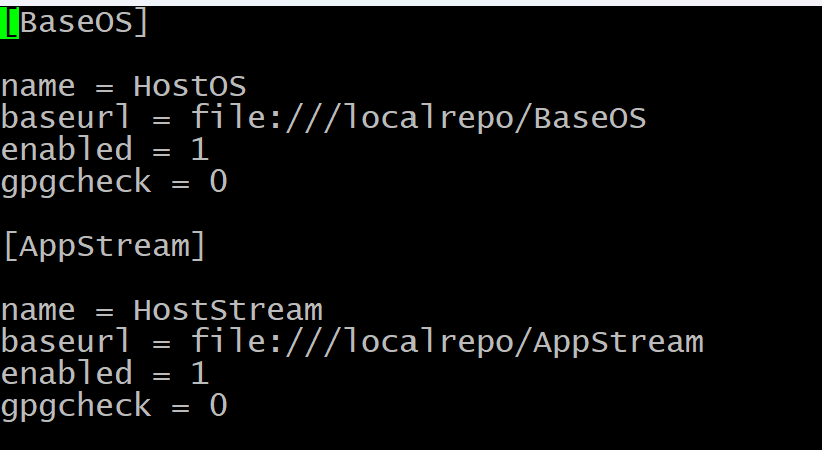
5.) vi host.repo, and now, here are the configurations that I set up:
[Repository name] - (The name for the repository)
name = (Any name you want)
baseurl = (Where the repo packages are located)
enabled = (Tells Red Hat if the repo should be enabled or disabled; 1 = enabled and 0 = disabled)
gpgcheck = (Verification for packages; 1 = enabled, 0 = disabled)
Note: for this environment, I set gpgcheck = 0 since it's easier to set up and I don't need a GPG key. I recommend setting gpgcheck = 1 for more security.
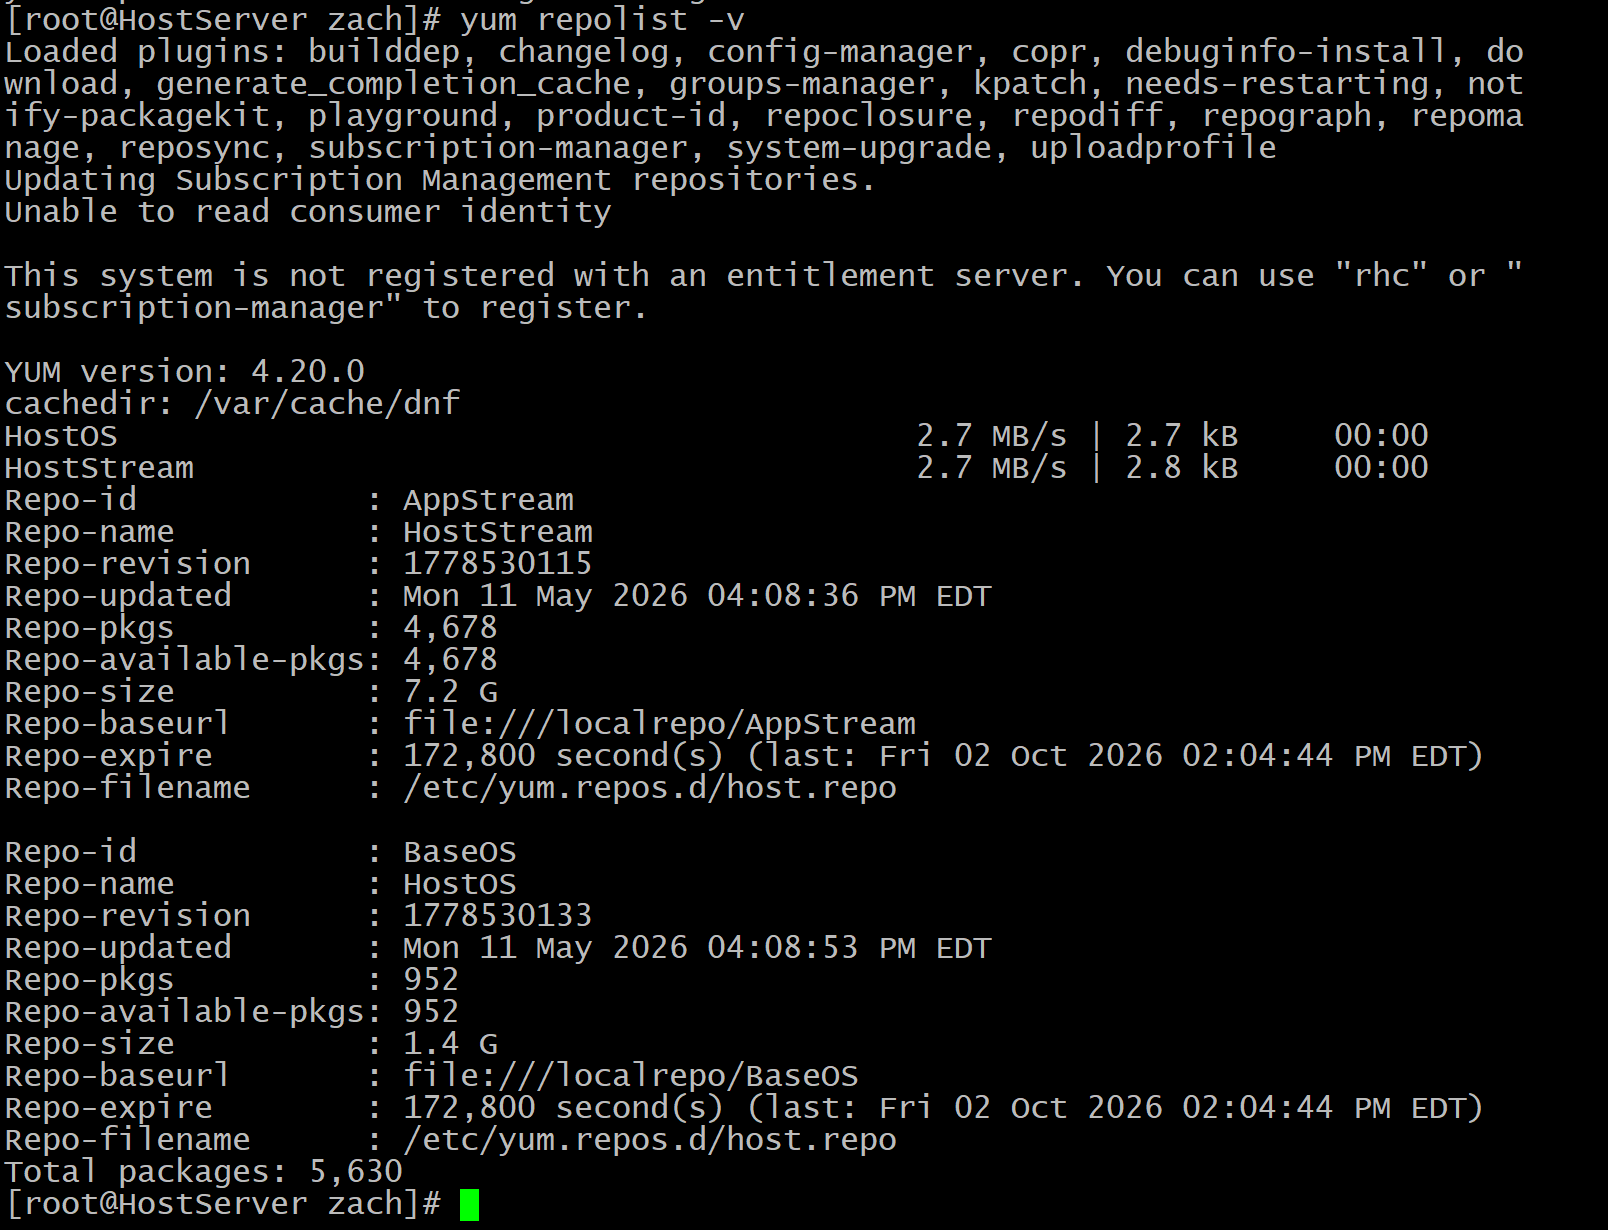
6.) From there, I save and exit the file and run yum/dnf repolist -v to view my packages and make sure everything is configured correctly.
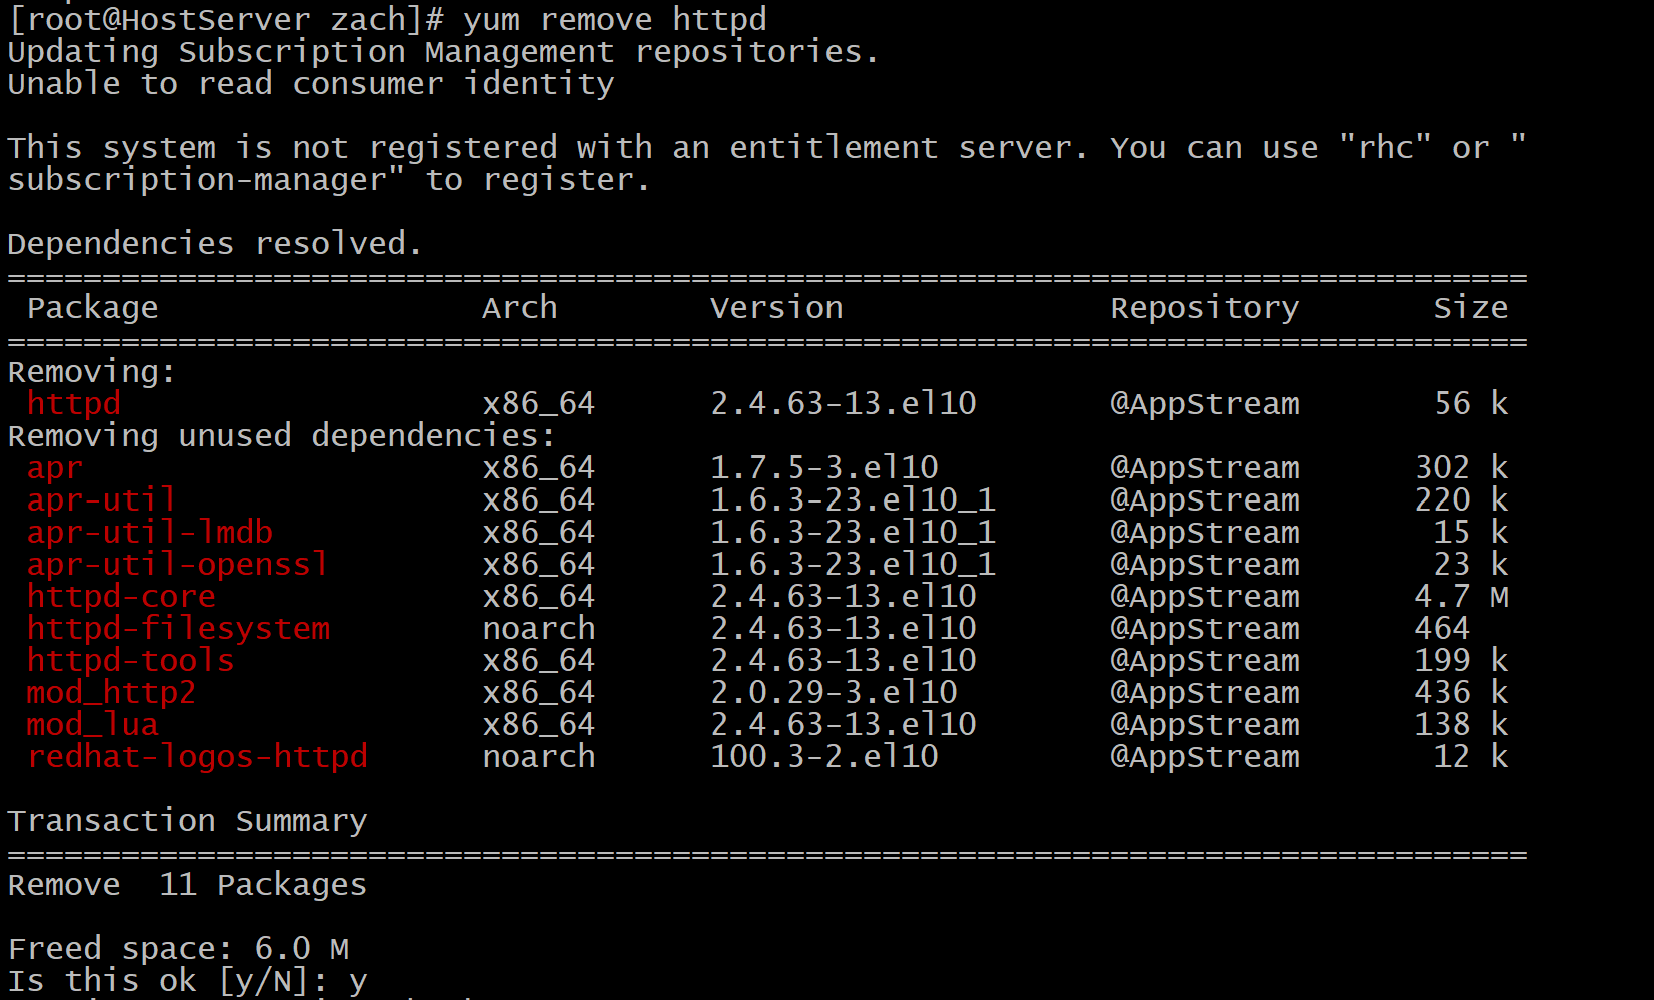
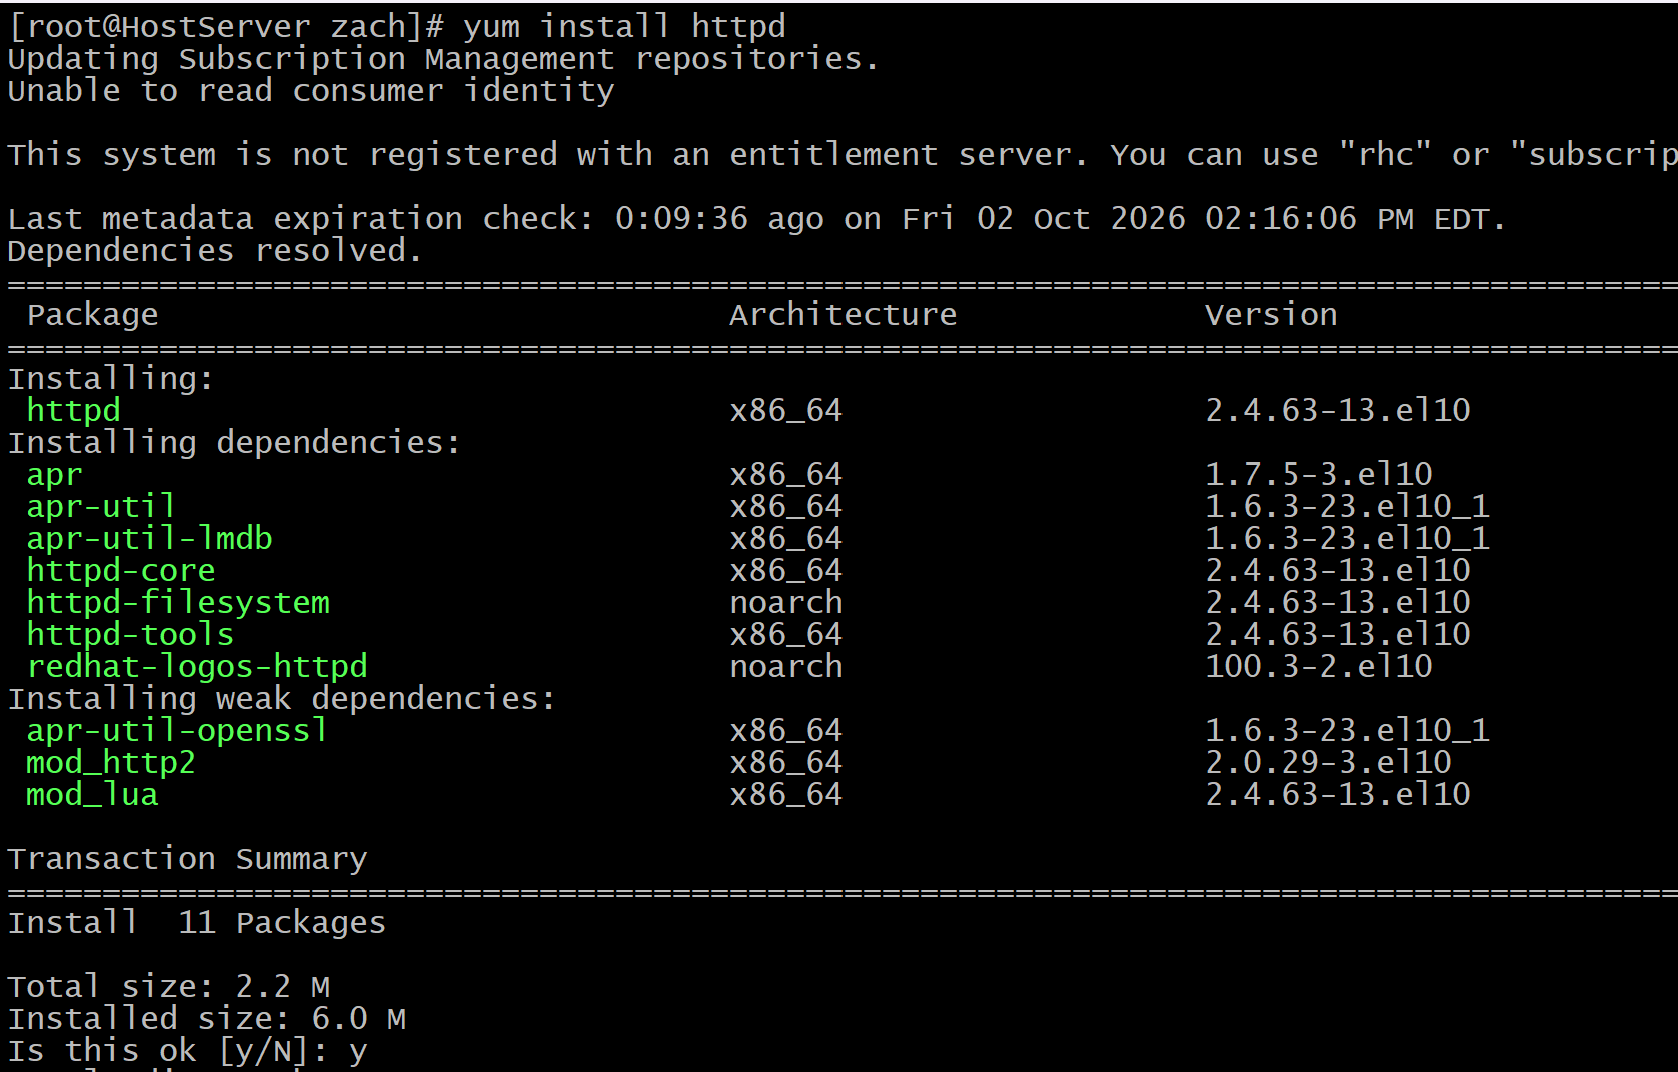
7.) Since everything is right, I can now install my desired packages using yum/dnf install (package name). You can also uninstall packages using yum/dnf remove (package name).
Note: when the install/remove prompt shows up;
y = Yes, install/remove,
n = No, don't install/remove
Conclusion?
With this, we now know how to set up a local repo to obtain software packages, updates, and other types of content. Local repos are a useful tool for managing software installations, especially in environments without internet access. Thank you for following along, and I hope you learned something new today!